The Aruba Instant On 1930 switches was released in June 2020 as the enhancement of the HPE OfficeConnect 1920S switches. Check out the differences in our transition guide here.
Aruba Instant On 1930 switches seamlessly integrates with existing Instant On access points and can be centrally managed with the Instant On mobile app onsite or remotely.
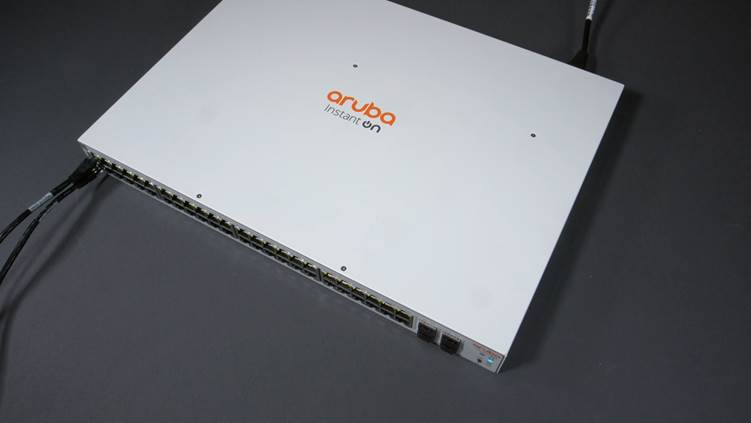
In this post, we’ll show you how to setup your Aruba Instant On 1930 48-Port POE Switch, and explore some of the features in the app.
Watch the Aruba Instant On 1930 48-Port POE Switch Unboxing and Quick Start Guide below or scroll further for the step-by-step walkthrough.
Setting up your Aruba Instant On 1930 48-Port POE Switch
- Power up your switch and connect Port 1 to your Internet router, and Port 2 to your laptop using Ethernet cables.
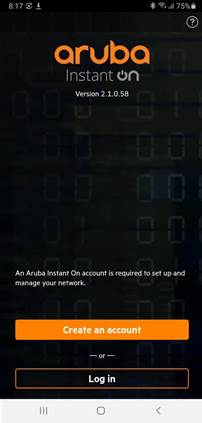
- From your mobile phone, login to the Apple Store or the Google Play Store. Search for the Aruba Instant On app, download and install it.

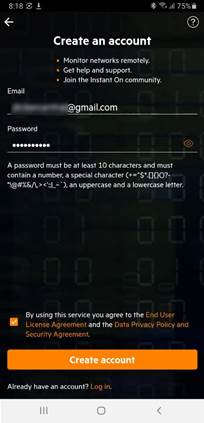
- Open the app and tap on Create an account. Follow the instructions on screen to setup your account.
- Login to your email to validate your email address. If you don’t receive the email, check your spam folder or tap on the Resend link.

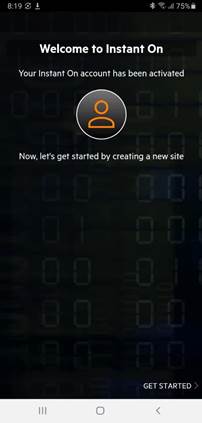
- Once your account is verified, tap on Continue.
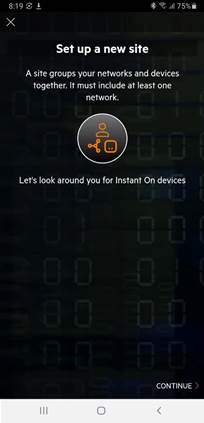
- Now, let’s setup a new site. Tap on Get Started.
- Tap Continue.
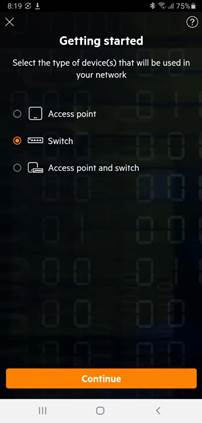
- In this guide, we’ll only be setting up the 1930 48-Port PoE switch. Select Switch, then tap on Continue.
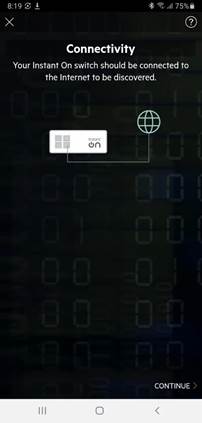
- Your switch should be connected to the Internet router in Step 1. If not, make sure your switch is connected to the Internet by plugging in your chosen uplink port to your local network. Tap Continue.
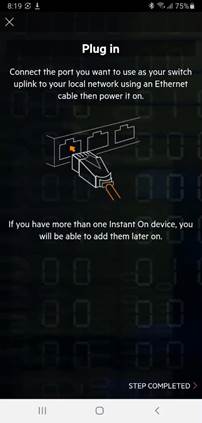
- Wait until the cloud LED light is flashing green and amber before you tap Step Completed to discover your device.
- Add your switch Serial Number by typing it in, or scan the barcode by tapping on Scan barcode. You can find the Serial Number on a sticker on the switch or the box it came in.
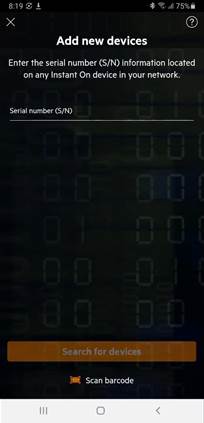
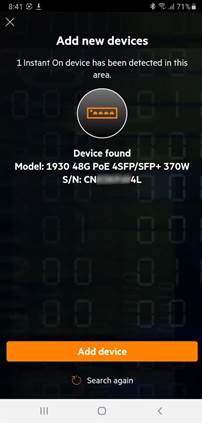
- Tap on Search for devices and your switch will be discovered by the Aruba Instant On portal.

- Confirm your device by tapping Add device. We’re now ready to start configuring your network.
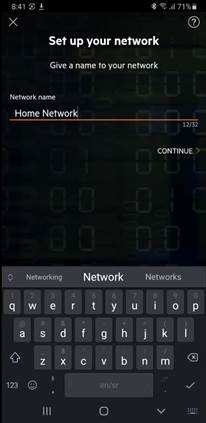
- Give your network a name. In this instance, we’ll be naming ours “Home Network”. Tap Continue.
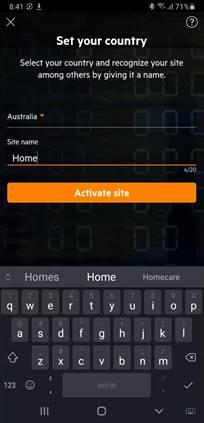
- Set your Country, name your site and tap on Activate site
- Your network is now ready!
Explore Your Network on the Instant On App
Let’s explore the various dashboards that you can access in the Aruba Instant On app.
There are 5 sections:

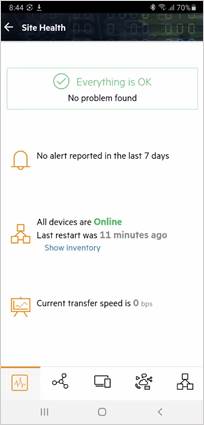
Site Health
Tap on the Site Health tile at the very top of the screen.
You can see if there’s been any alerts in the last 7 days, when your last network restart was and the current transfer speed.
Networks
Tap on the Networks tile. It will show you the number of active wired and wireless networks you currently have.

You can add more networks by tapping on the plus button at the bottom right corner.
Give your network a name and specify a valid VLAN ID.
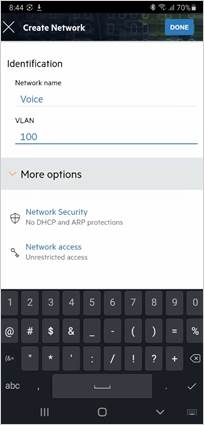
When you’re ready, tap on “Done” at the top right corner and give it a few seconds.
Your new network will appear on the list of networks.
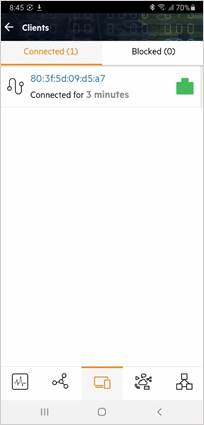
Clients
Tap on the Clients tile to see the devices currently connected to your network and how long they have been connected for.
In our example below, you can see our switch has been connected for the last 3 minutes.
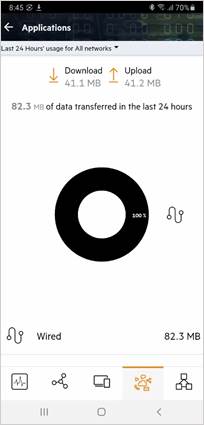
Applications
Tap on the Applications tile. This section give us some information on the network throughput.
Inventory
Tap on the Inventory tile. Here, you can see your switch and any other Instant On devices you may have connected to the network.
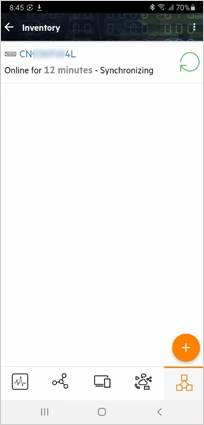
We can see more details of the switch by tapping on the switch name. Let’s name our switch and have a look at the settings.
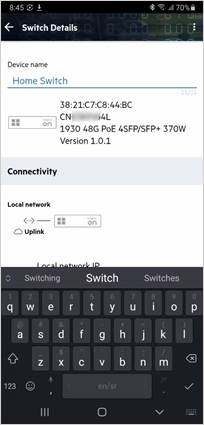
Port 1 is connected to our network and it is used to communicate with the Aruba Instant On Cloud which is indicated by the cloud icon. Our laptop is plugged into Port 2.

Setting up a 1930 8-Port POE Switch? Check out the guide here.