Affordable, secure, powerful and easy-to-use, Aruba Instant On delivers an enterprise-grade office network at a small business price. With features including built-in security, enhanced network visibility, extensive network capacity and lightning-fast speeds, Instant On is a great choice for small businesses requiring more from their network.
Indoor and outdoor rated access points give cafes, bars and restaurants the opportunity to offer free Wi-Fi to customers, while the responsive mobile app makes it easy to manage networks from anywhere. In fact, setting up Aruba Instant On doesn’t require any IT expertise – it can be set up in minutes just by using the handy mobile app.
How to easily set up your office network with Aruba Instant On
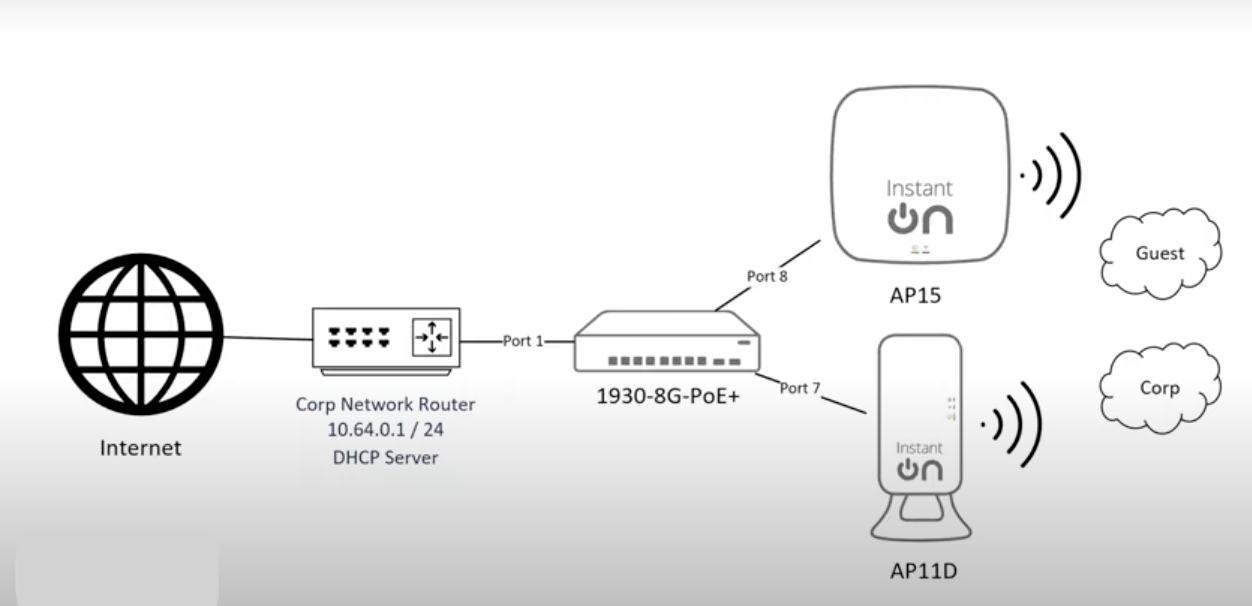
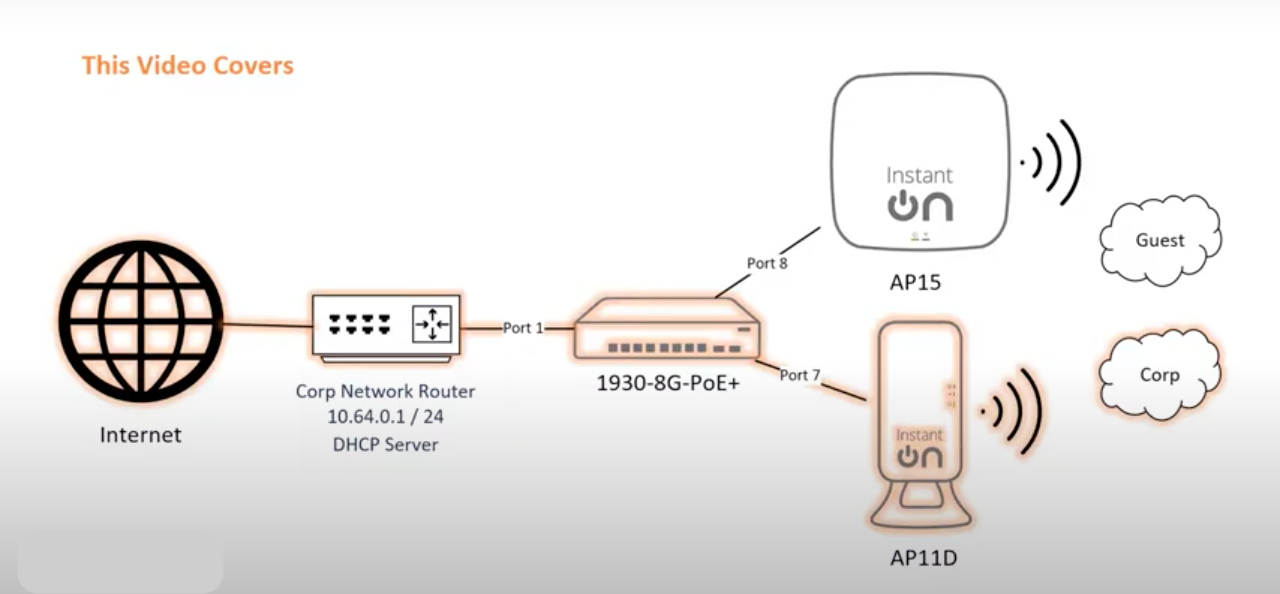
This guide will take you step-by-step through the process of setting up your office network as displayed below, including:
- Setting up your Aruba Instant On access point and switch
- Configuring a secure wireless network for guests
- Extending coverage across your office using an additional access point
1. Setting up your Aruba Instant On access point and switch
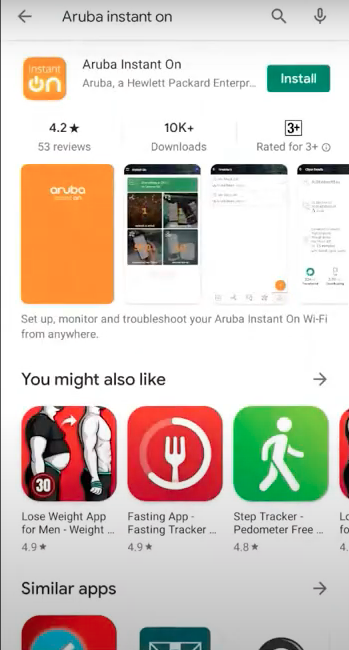
Step 1: Head to the Google Play or Apple App Store, search for the Aruba Instant On app and install it on your device.
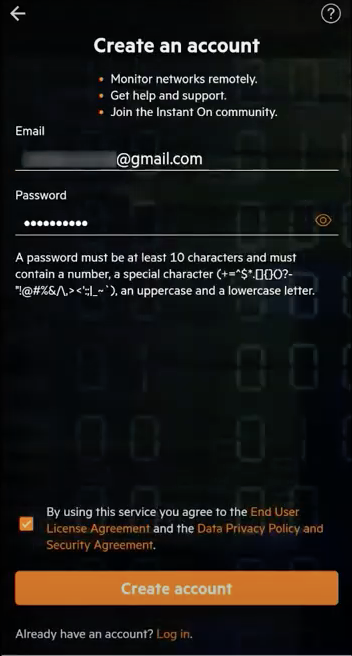
Step 2: Open the app and tap on Create an account.

Step 3: Fill in your email address, choose a password, accept the end-user license agreement and click on Create account.
Step 4: Log into your email account to complete the verification process. If you didn’t receive an email, check your spam folder or try Resend.

Step 5: After verifying your email address, click on Get started.

Set up a new site for your Aruba Instant On devices.

In this example, we’ll set up an access point and a switch. Tap Continue to begin

Step 6: In this example, we’ll connect to an existing router.
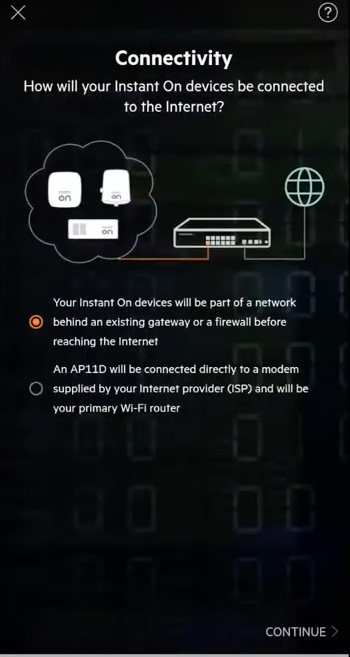
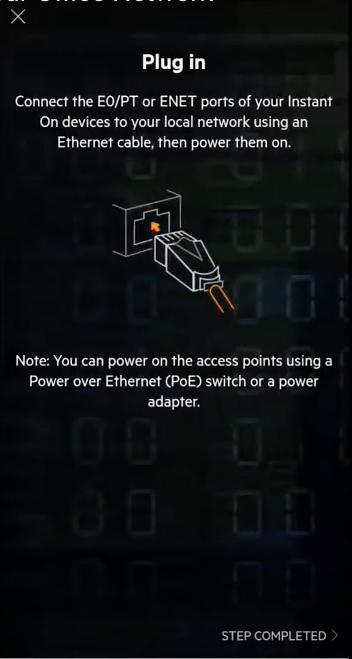
Before continuing, ensure:
- your access point is connected to the switch
- the switch is connected to your office router
- both your access point and switch are powered up.
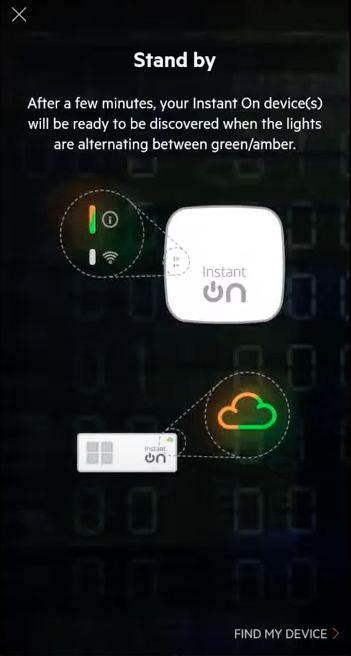
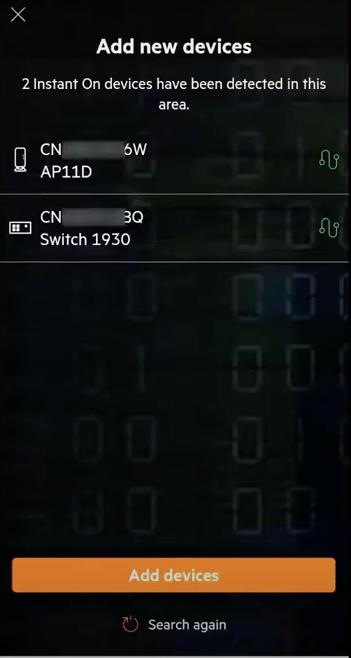
Step 7: Wait until the cloud LED light is flashing green and amber before trying to discover your Instant On device. Tap on Find my device and you should be able to see both the switch and the access point.
Tap on Add devices and you’re ready to start configuring your network.
Step 8: Type in your wireless network name and set the password.

Set your country, the name of your site and click on Activate site.

The network is now ready.

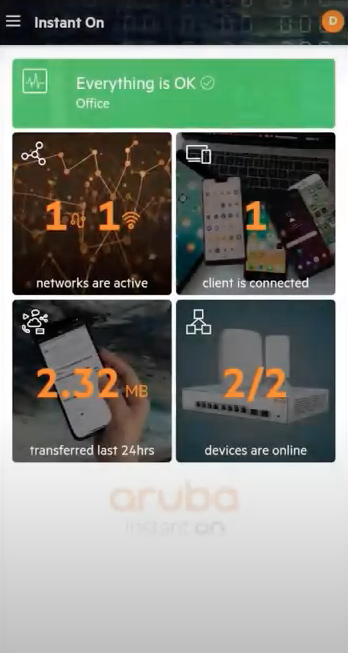
Step 9: After clicking Show it to me, you’ll be taken to the home screen where you’ll be able to see that your wired and wireless networks are now ready and that your access point and switch are now online. Let’s connect a laptop to your new network.
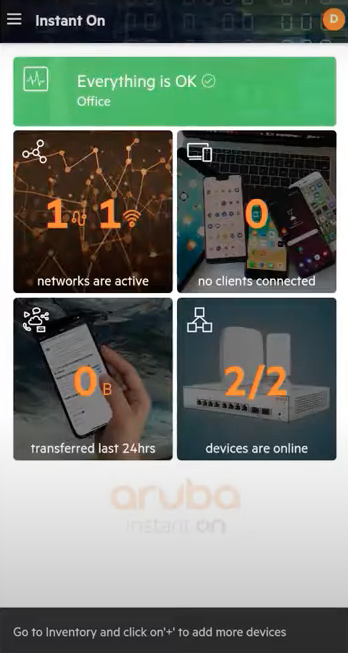
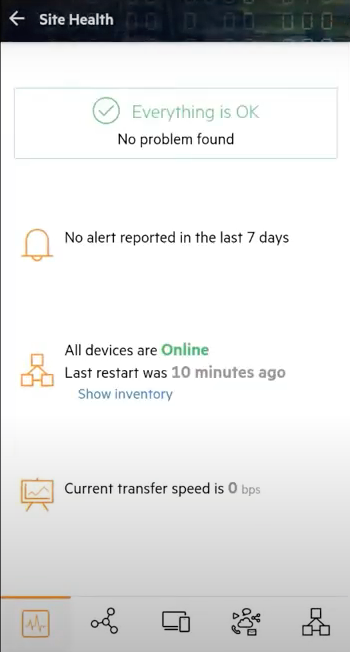
Step 10: First, click on the site health tile at the top of the screen to see if there are any issues with the network.
Step 11: Next, click on the networks tab at the bottom of the screen to see the network you just set up in the list.

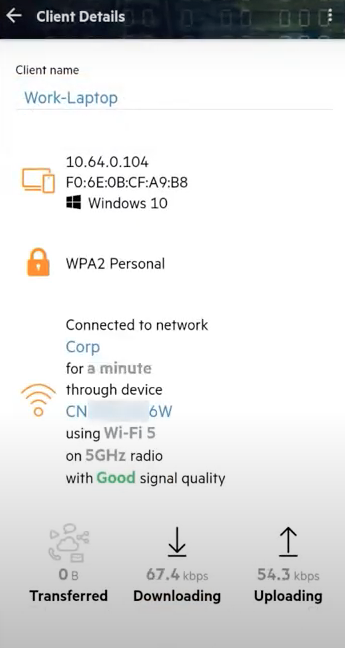
Step 12: Click on the client tab at the bottom of the screen and then tap on the client itself. You’ll see a laptop connecting wirelessly using the corporate network on access point 1.

Step 13: Tap on the applications tab at the bottom of the screen to view network usage.

Step 14: Tap on the inventory tab at the bottom of the screen.

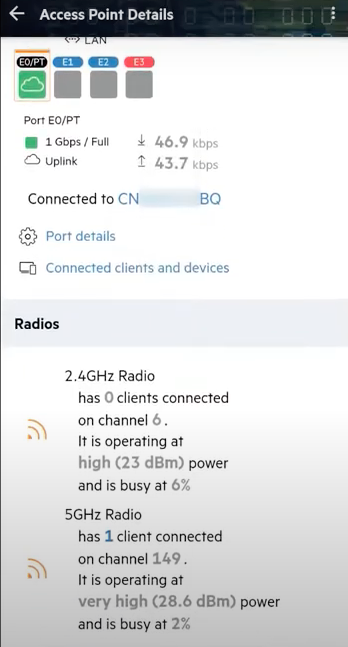
Tap again on the access point itself and give it a meaningful name.

Scroll down to see other details such as which port the AP is using to connect to the network through the Aruba Instant On switch and whether both radio frequencies are active.
Step 15: Tap back to the inventory page.
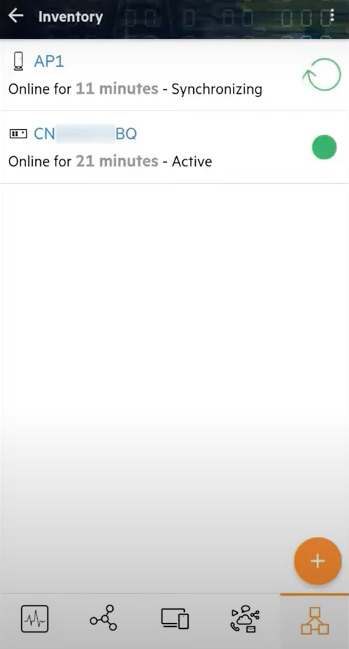
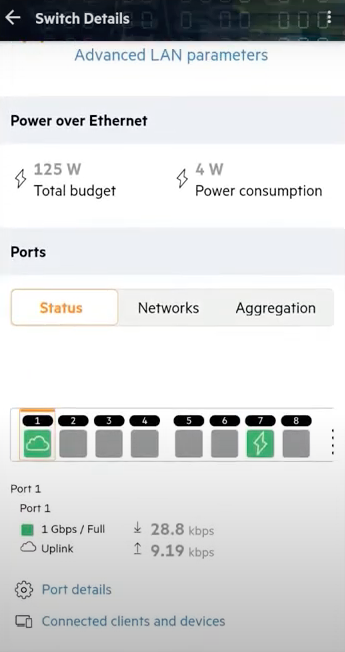
Click on the switch. If you scroll down, you can see port 1 is connected to the office network – this is how the switch is communicating with the Aruba Instant On portal (as indicated by the cloud icon).

You can also see the access point is connected to port 7 and is drawing power (as indicated by the lightning icon).
Step 16: Tap back twice to the home screen and you’re done.
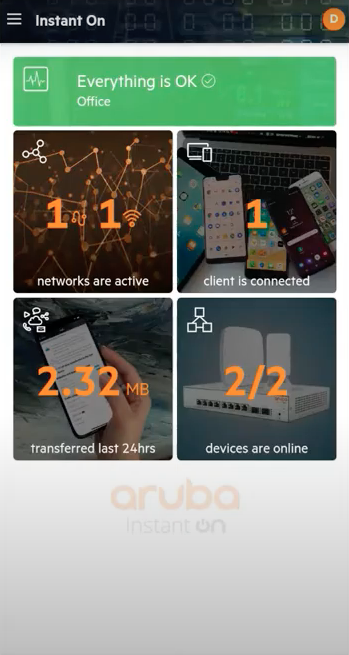
Your Aruba Instant On access point and switch are now set up, as well as wired and wireless networks for your office.
2. Configuring a secure wireless network for guests
Now you’ve set up your office network (as indicated in blue in the image below), you can move onto creating a dedicated wireless network for guest use (indicated in orange).

Step 1: On your home screen, tap on the network tile.
Tap on the + button in the bottom right corner to add a new network.1

Step 2: make the following selections:
- For network type, choose Wireless
- For usage, select Guest
- Name the network Guest
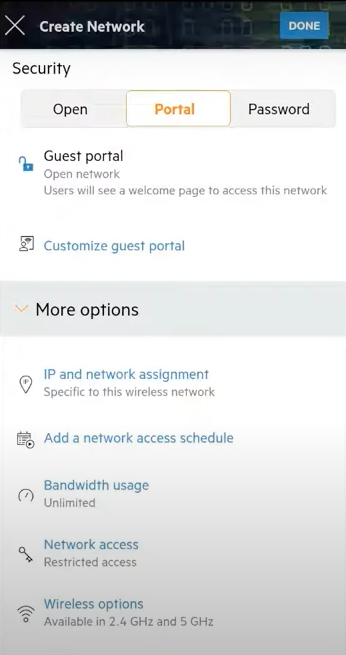
- Choose Portal to onboard guest users
- Then tap on Customise guest portal

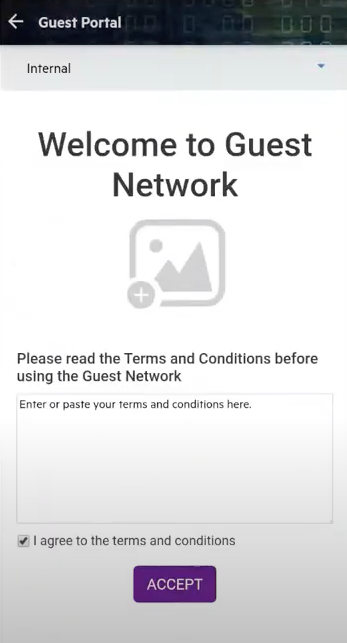
Step 3: Customise your guest portal screen by uploading your logo and adding guest network terms and conditions. Once complete, review the page and tap back to continue setting up your guest network.
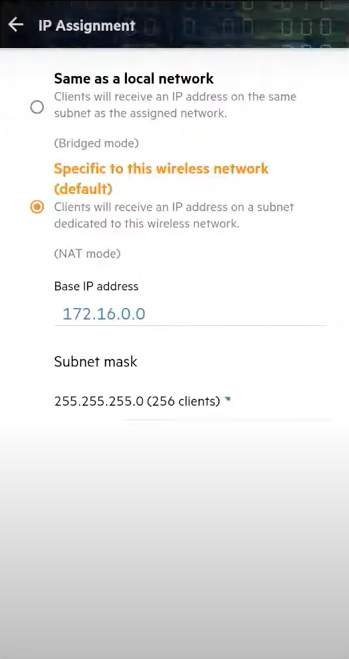
Step 4: It’s time to put controls on what your guests can access when they use your guest network. Start by limiting access to your corporate network. Tap on IP and network assignment.

Ensure Specific to this wireless network mode is selected to ensure guests are placed on a separate network from your main one.
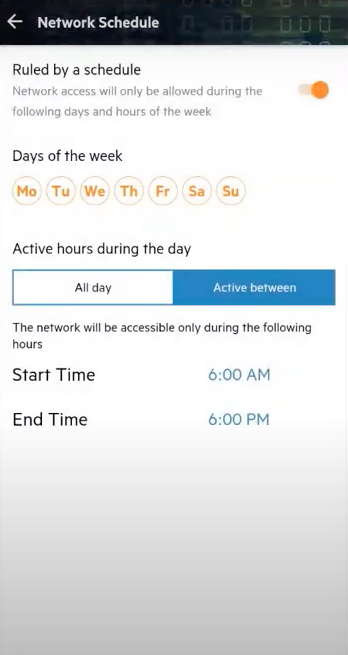
Step 5: Limit the time the guest network broadcasts to avoid any misuse after hours by tapping on Add a network access schedule.
Create a schedule that matches your business hours (e.g. 9am to 5pm).
Step 6: Limit bandwidth usage for guests to make sure your corporate network is not affected by selecting Bandwidth usage.
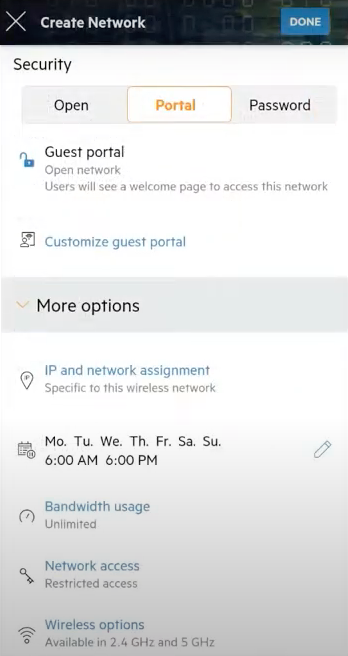
Restrict network bandwidth per client to 10Mbps.

Step 7: Tap on Network access.

Ensure restricted access is selected. This will disable guest access to the corporate network and will also keep guest access isolated from each other for greater security.

Tap back, review the settings and tap on Done.
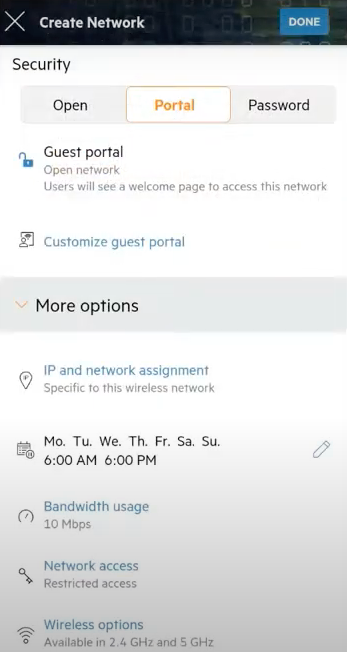
Step 8: To further secure the network, tap on the applications tab and scroll down until you see the Adult content category.

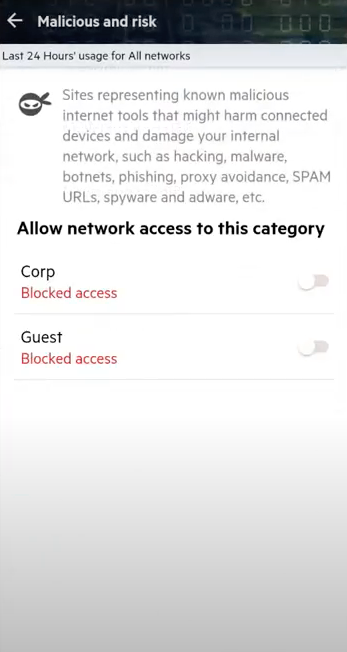
Click on it and block access for both corporate and guest users. Repeat the process for both Explicit content and Malicious and risk categories.
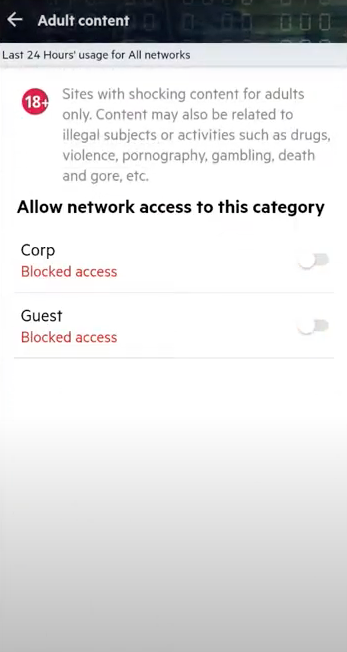
Repeat the process for Explicit content.
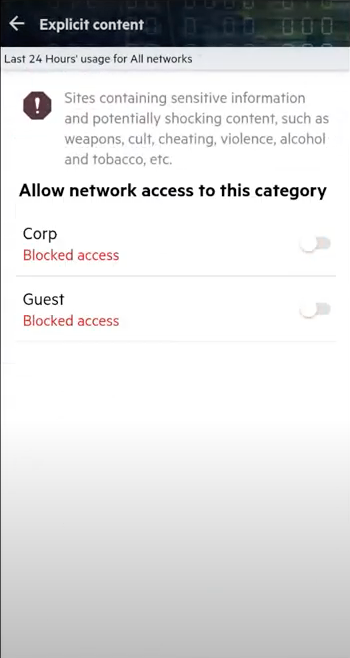
And, for malicious and risk sites as well.
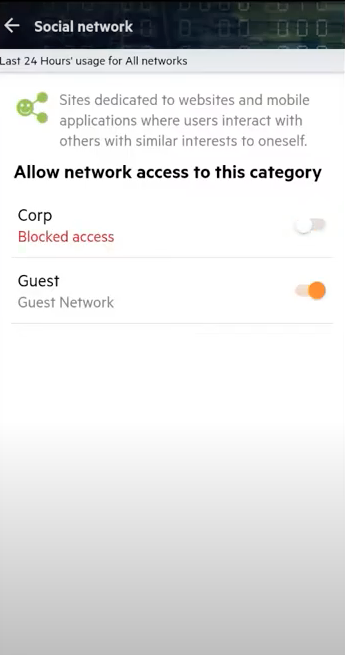
Step 9: To ensure employees remain productive, click on Social network.

Block access for your corporate network but allow access to the guest network. Tap back twice to return to the home screen.
Step 10: it’s time to connect a device to the guest network. Tap on the Device tile.
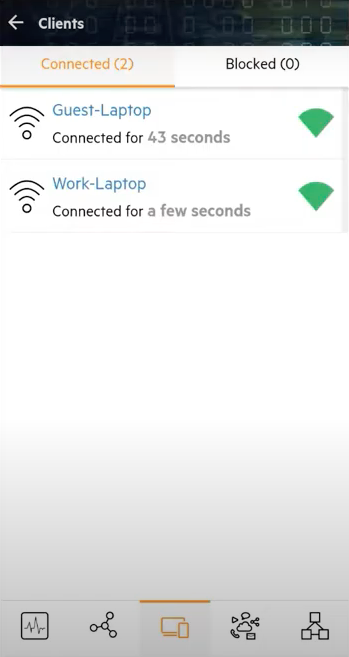
Select the newly connected guest device. You can see that it’s connected to the guest network and that its IP address starts with 17.
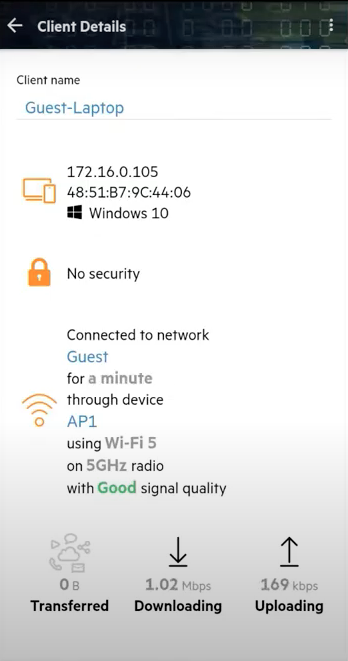
Go back and tap on the corporate laptop. You can see that it’s connected to the corporate network and has an IP address starting with 10, demonstrating each device is connected to a separate network.
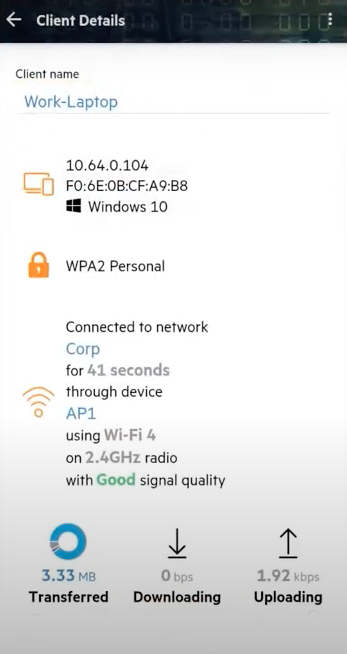
Step 11: Tap back twice to arrive at the home screen and you’re done. You’ve set up a secure wireless guest network, separate from your office network.
3. Extending your wireless network using an additional access point
Now you’ve set up your office network plus a dedicated guest network (as indicated in blue in the image below), you can extend your wireless network using an additional access point to improve network capacity and coverage (indicated in red).
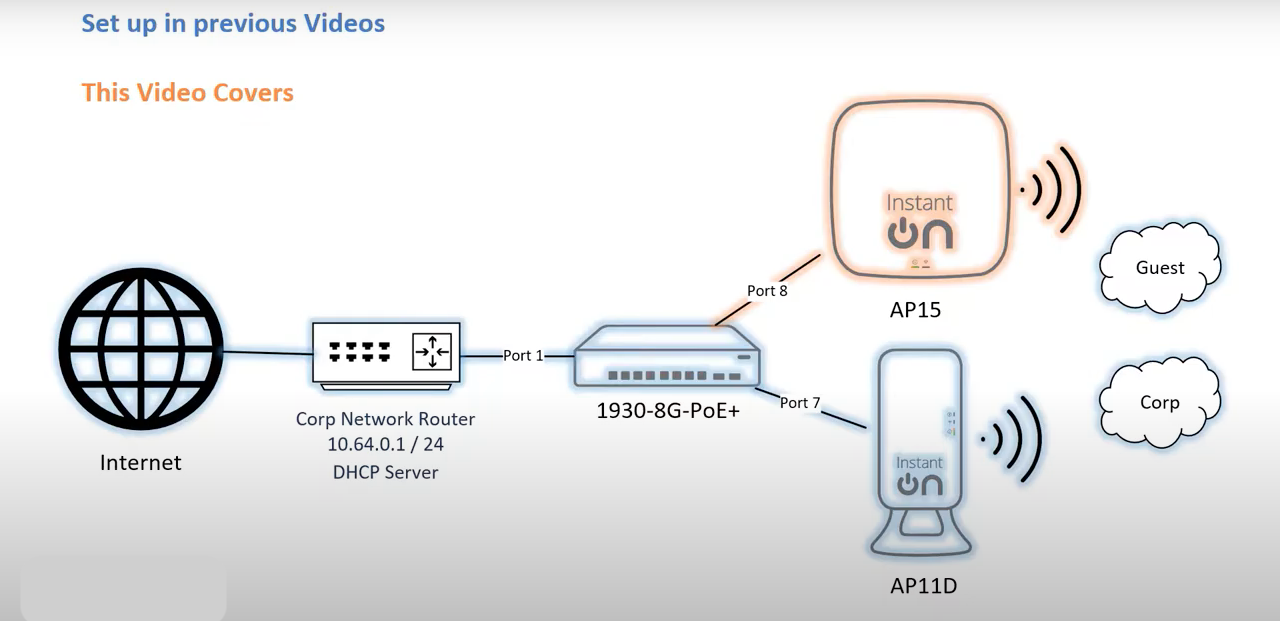
Step 1: Plug an additional access point into Port A of your switch. On the home screen, tap on the hamburger icon in the top left-hand corner and select Add a new device.
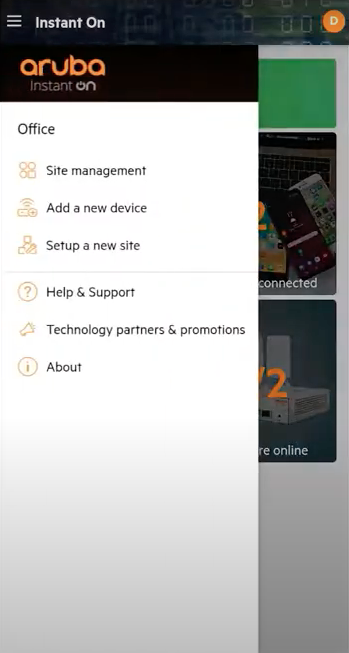
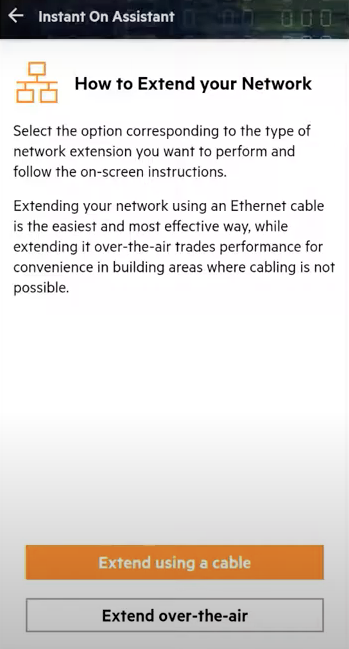
Then select How to extend my network.
Step 2: There are two ways you can extend your network. You can use a cable to connect additional access points or connect over the air if you don’t have cabling. Cabling is the most efficient way and offers the best performance. In this example, we’ll use cabling.

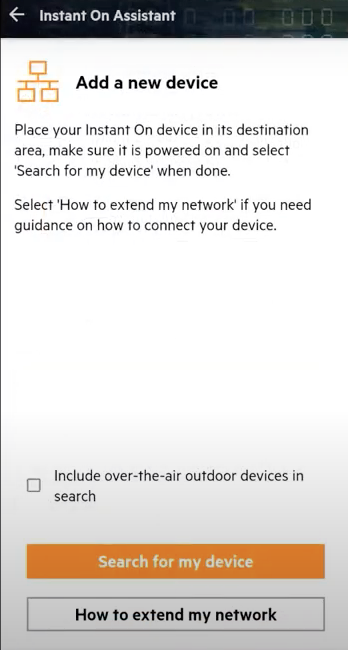
Step 3: Once the lights on your second access point are flashing green and amber, click on Search for my device. Ensure your phone Bluetooth is turned on and that you are close to the AP you are trying to discover.
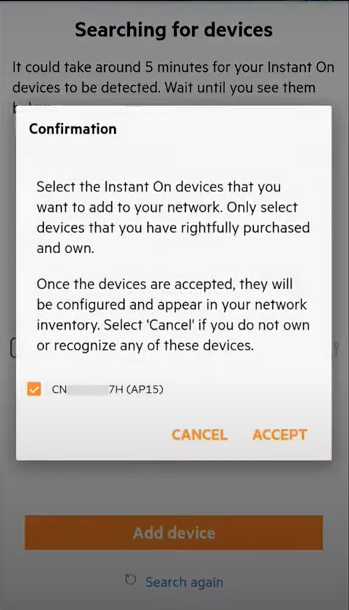
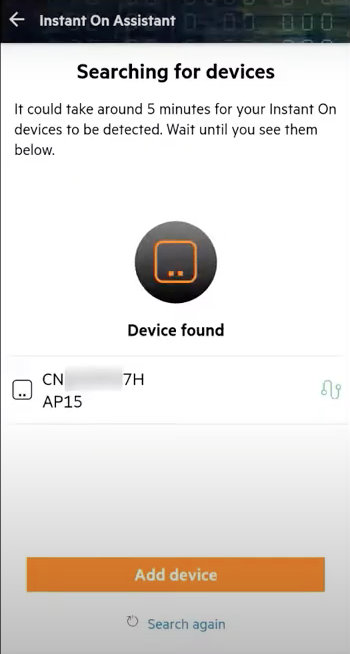
Step 4: Tap on Add device.
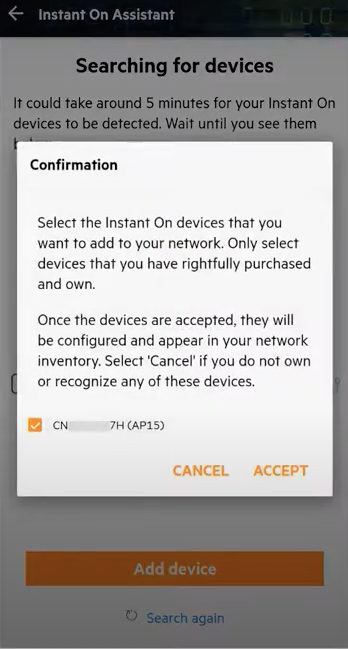
Confirm it’s your device and click Accept.
Your new access point has been added to the network.
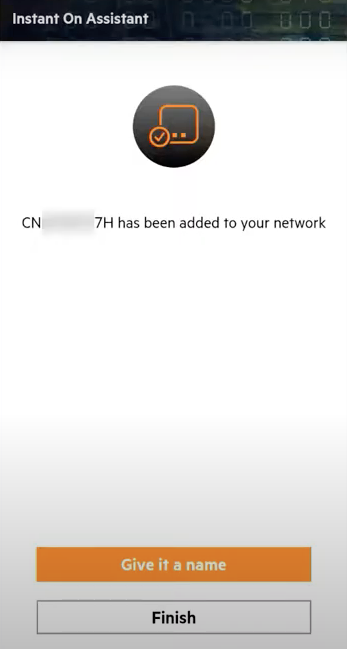
Step 5: Give your new access point a name.

Tap back and you’ll see it sync with the cloud. Once the synchronisation is complete, the access point will start broadcasting all the networks you’ve set up.
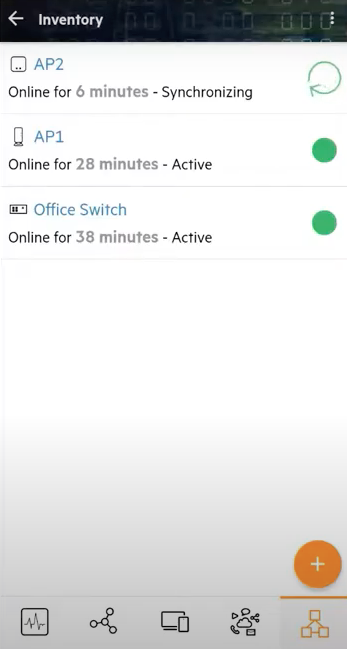
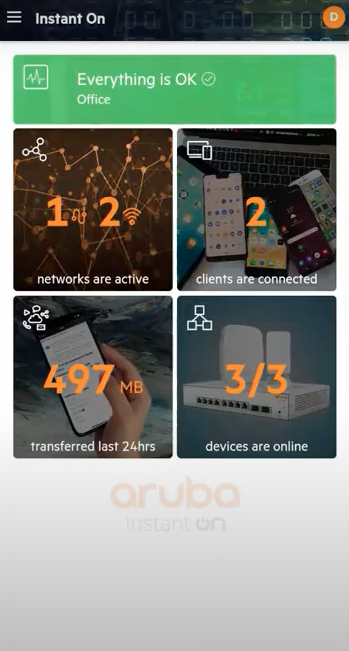
Step 6: Tap back to the home screen and that’s it! You’ve now extended the coverage of your wireless network by using an additional access point.
To follow a run-through of these steps in real-time, check out our series of Office Network video tutorials – https://instanton.club/library-category/office-network-setup/.


