Affordable, secure, powerful and easy-to-use, Aruba’s Instant On is perfect for the growing online needs of modern families. With capacity to support up to 50 devices, super fast speed and a host of customisation features, Instant On delivers secure, reliable and fast Wi-Fi, inside and outside the home.
Despite being an enterprise-grade networking solution, Instant On doesn’t require IT expertise to set-up, making it a great choice for the home. This user guide takes you through the entire process of setting up Aruba Instant On, showing you just how easy the system is to set-up using the handy mobile app.
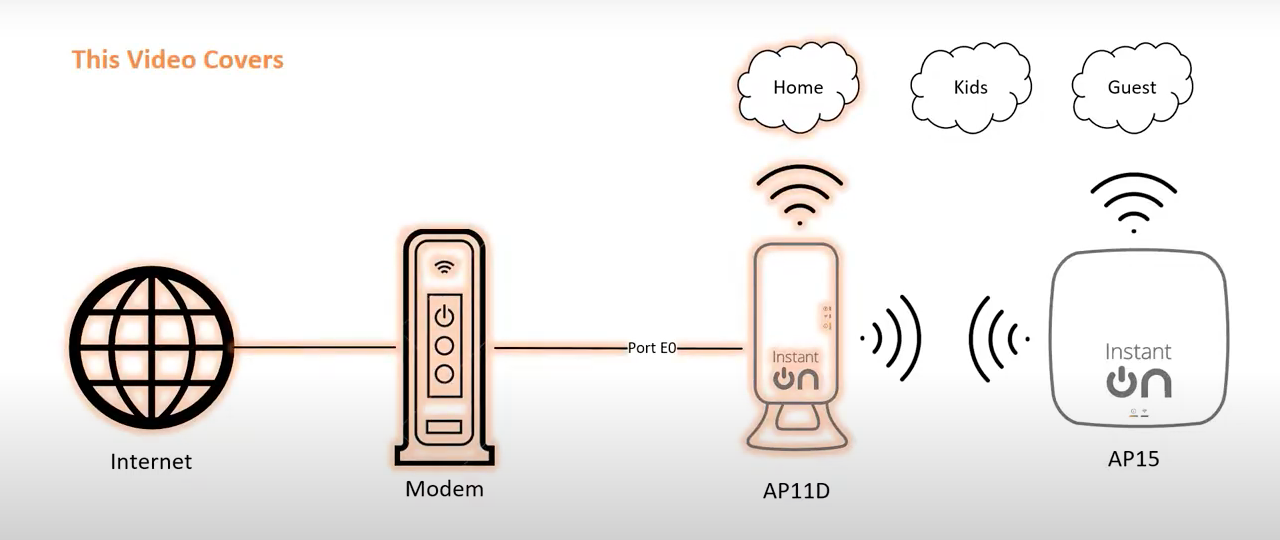
How to easily set up your home network with Aruba Instant On
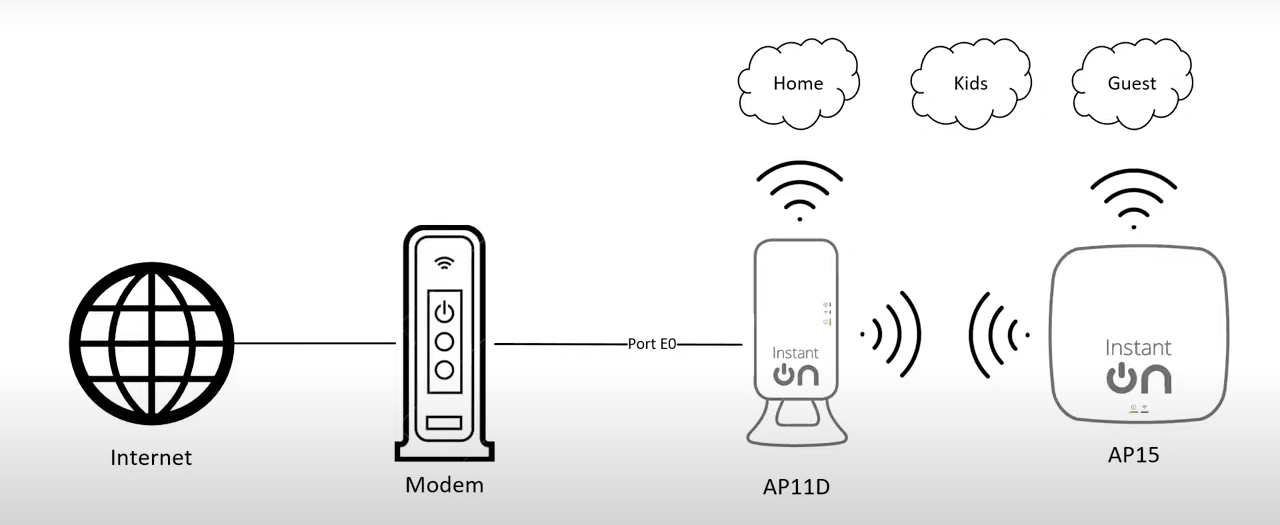
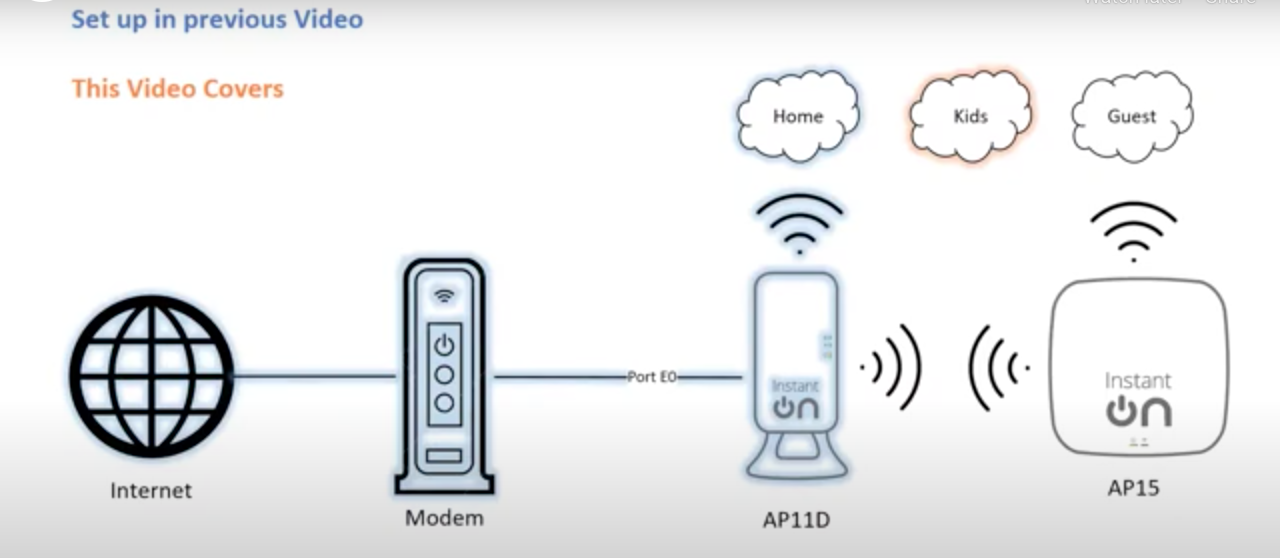
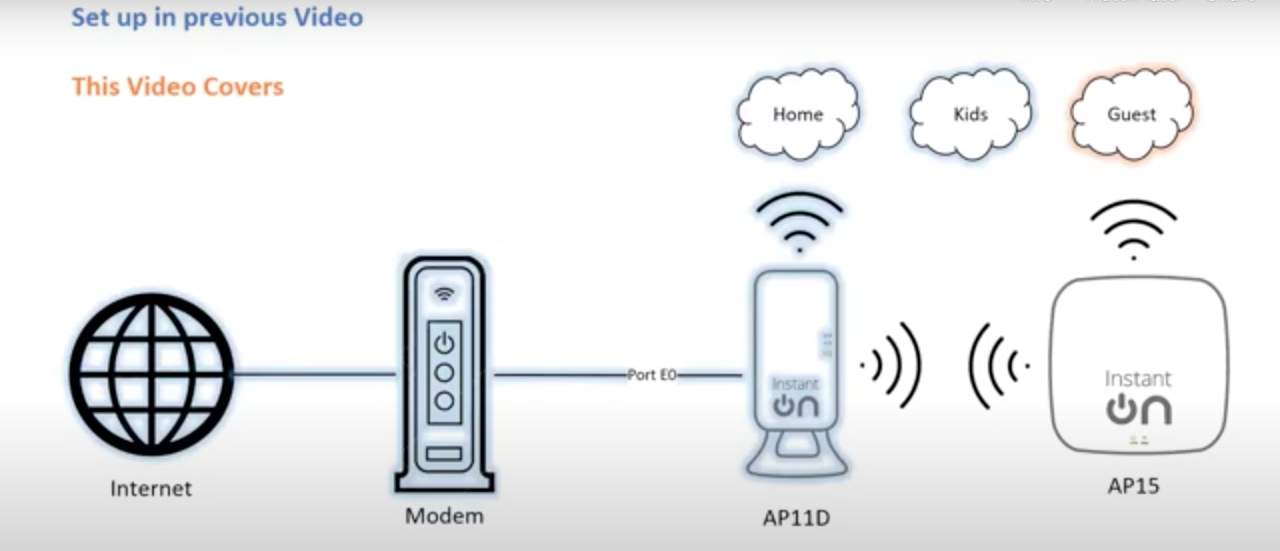
This guide will take you step-by-step through the process of setting up your home network as displayed below, including:
- Setting up your Aruba Instant On AP11D as your internet router
- Creating a secure wireless network for your kids
- Configuring a secure wireless network for guests
- Extending coverage across your home using an additional access point
1. Setting up your Aruba Instant On access point as your internet router
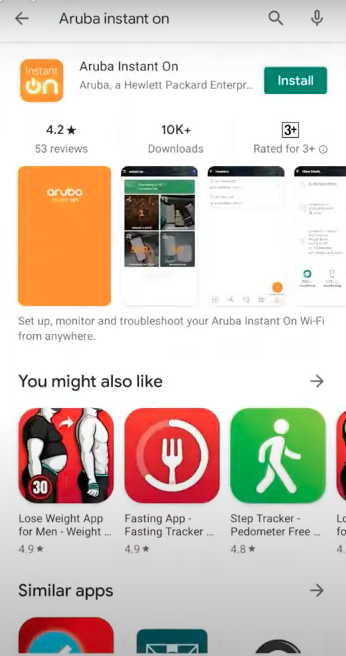
Step 1: Head to the Google Play or Apple App Store, search for the Aruba Instant On app and install it on your device.
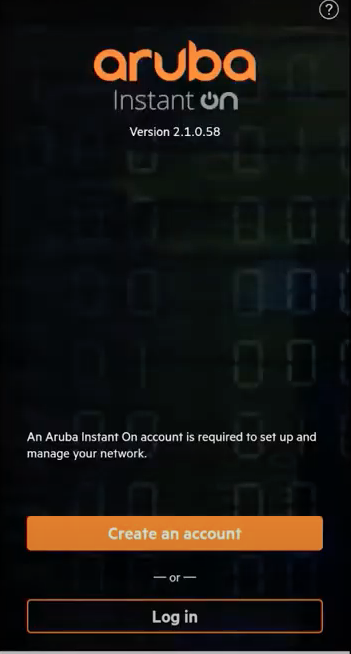
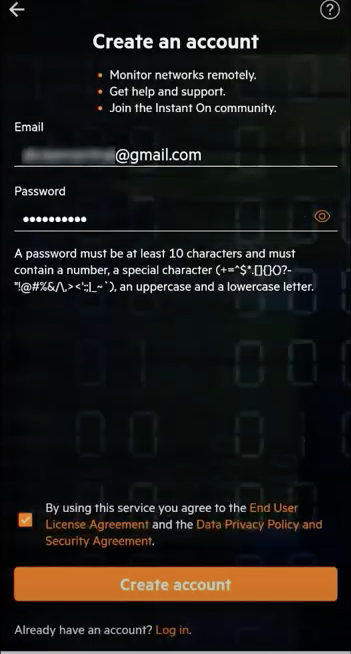
Step 2: Open the app and tap on Create an account.
Step 3: Fill in your email address, choose a password, accept the end-user license agreement and click on Create account.
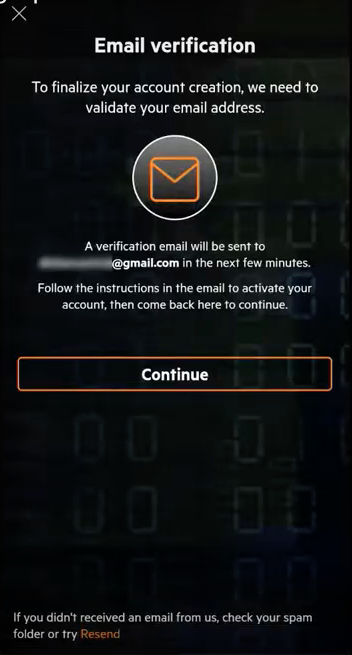
Step 4: Log into your email account to complete the verification process. If you didn’t receive an email, check your spam folder or try Resend.
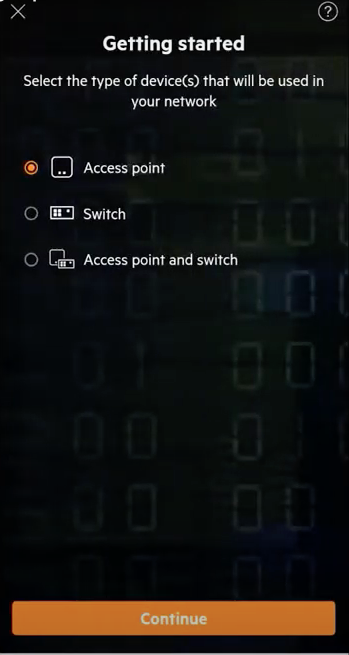
Step 5: After verifying your email address, click on Get started.

Tap Continue to set up a new site for your Aruba Instant On devices.

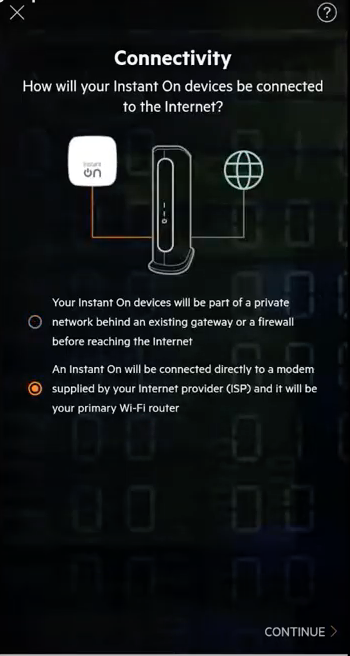
In this example, we’ll start by setting up our access point to serve as our internet router, connecting it directly to our modem. Tap Continue to begin
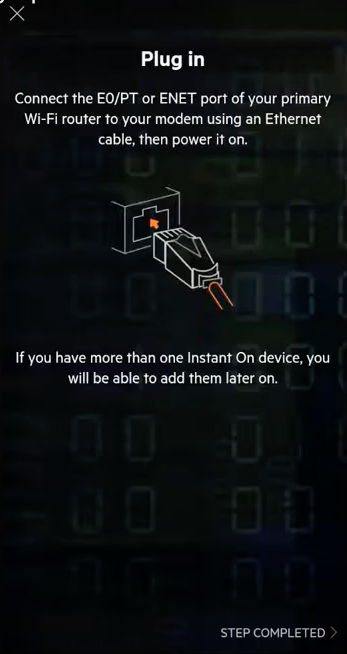
Step 6: In this example, we’ll connect to an existing router.
Before continuing, ensure your access point is connected to your modem and powered up.
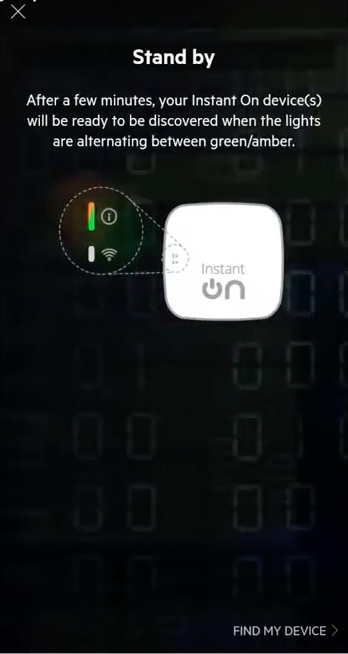
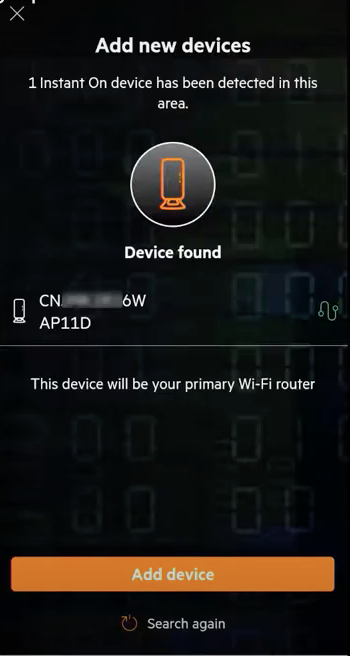
Step 7: Wait until the cloud LED light is flashing green and amber before trying to discover your Instant On device. Tap on Find my device and your access point will be discovered by the Aruba Instant On portal.
Tap on Add devices and you’re ready to start configuring your network.
Step 8: Type in your wireless network name and set the password.
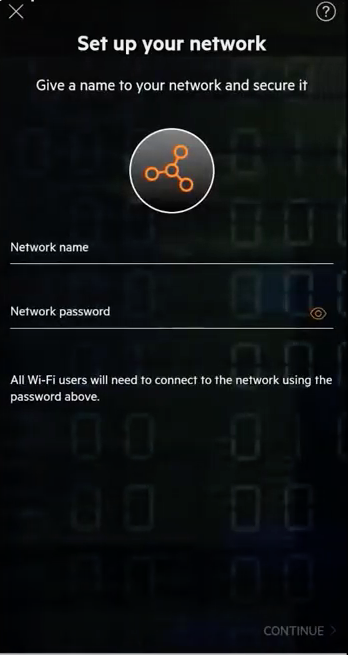
Set your country, the name of your site and click on Activate site.

The network is now ready.
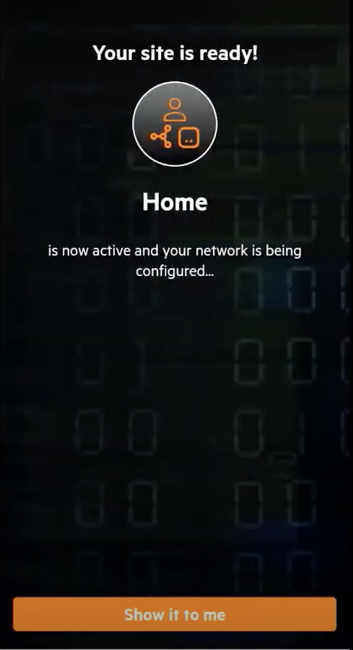
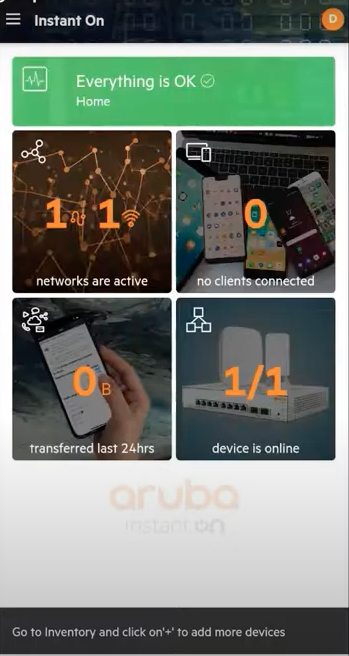
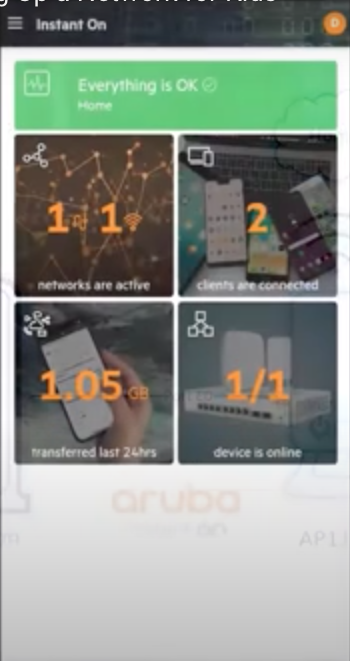
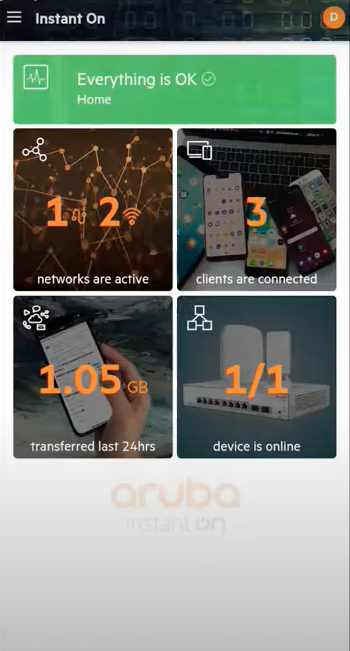
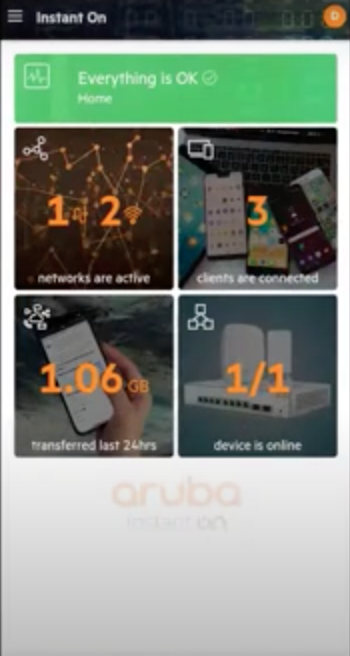
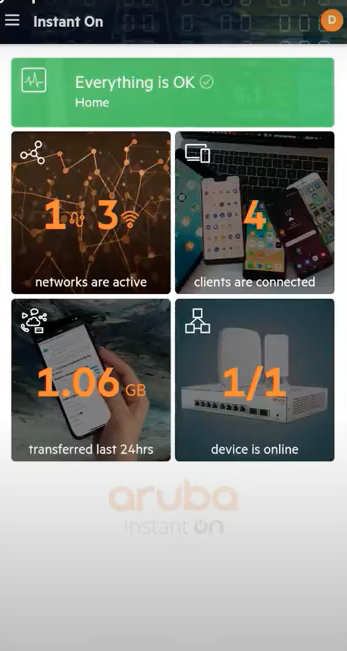
Step 9: After clicking Show it to me, you’ll be taken to the home screen where you’ll be able to see that your wired and wireless networks are now ready and that your access point is online. Let’s connect a computer to port E1 on the access point and use a laptop to connect to the newly setup home network. You’ll see there are two clients connected.
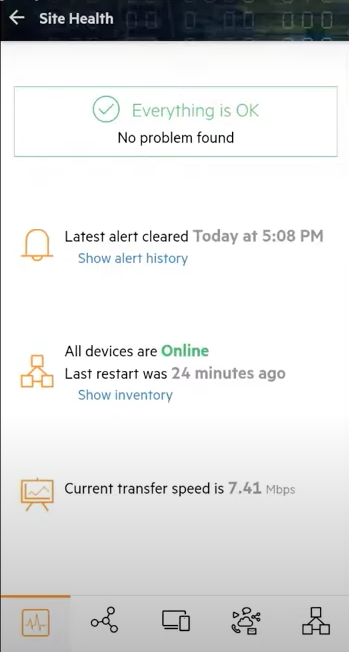
Step 10: First, click on the site health tile at the top of the screen to see if there are any issues with the network.
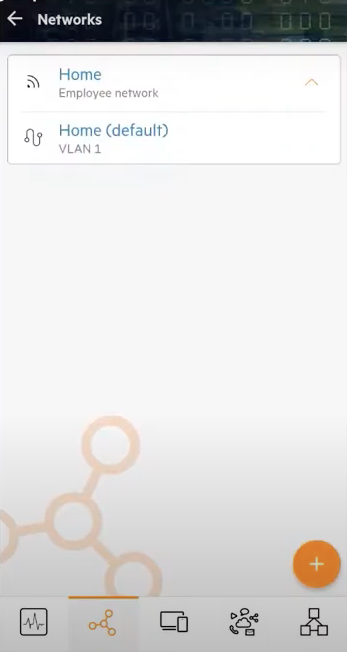
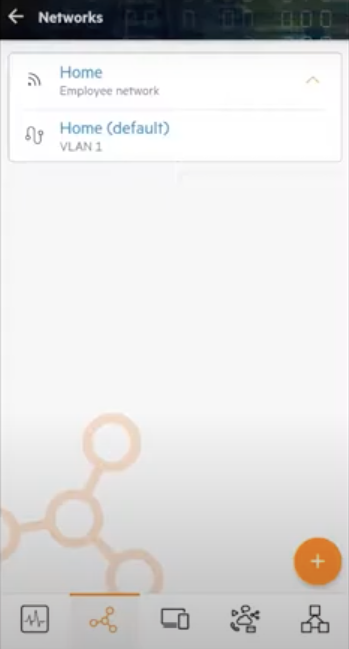
Step 11: Next, click on the networks tab at the bottom of the screen to see the network you just set up in the list.
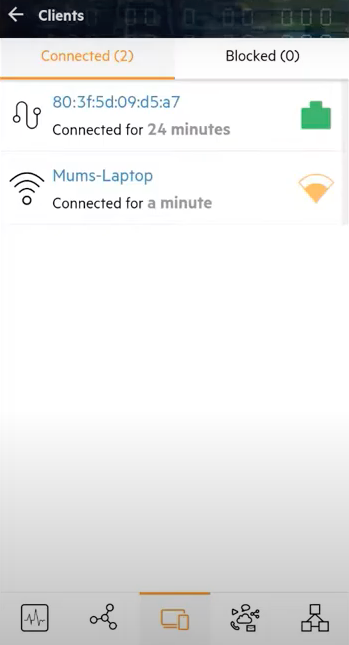
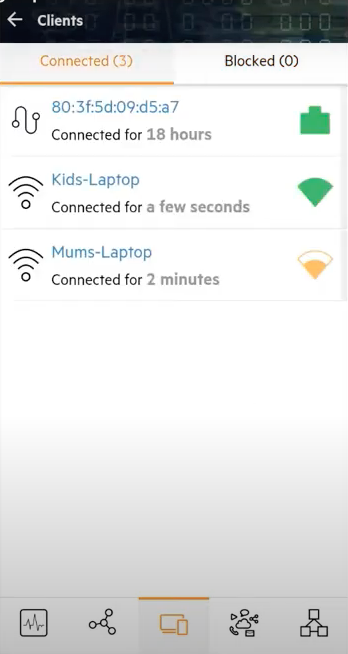
Step 12: Click on the client tab at the bottom of the screen. You’ll see a desktop connected by a cable and a laptop connecting wirelessly.
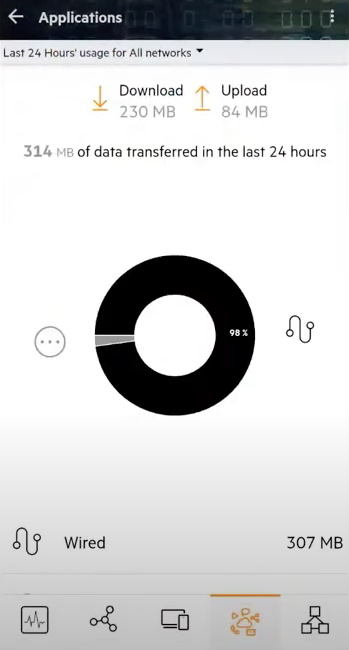
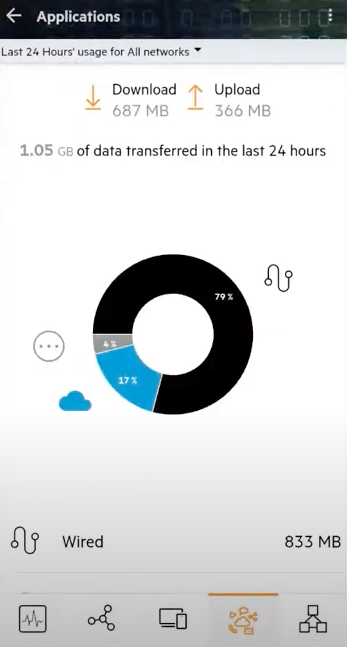
Step 13: Tap on the applications tab at the bottom of the screen to view network usage.
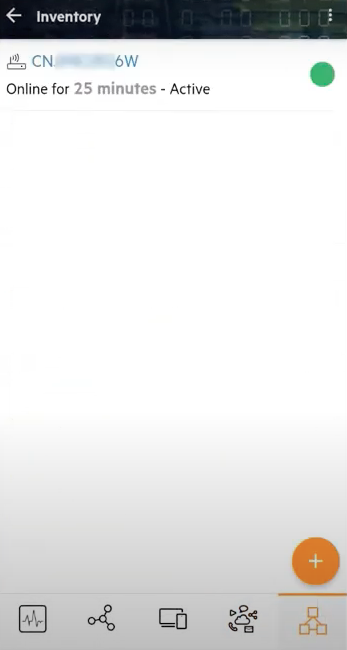
Step 14: Tap on the inventory tab at the bottom of the screen.
Tap again on the access point itself. Here we can give the AP point a meaningful name and see it’s connecting directly to the internet and has obtained a public IP address through our modem.
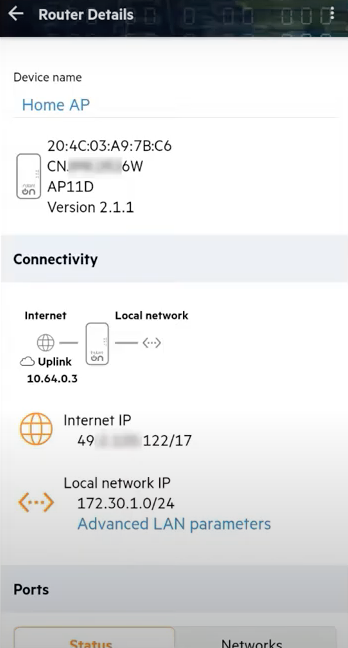
Scroll down to see that our WAN port, E0, is connected to the cloud portal. One of our LAN ports, E1, is also connected. You can also see that both radio frequencies are in operation.

Step 15: Tap back twice to the home screen and you’re done. Your Aruba Instant On access point is now acting as your wireless router and providing wired and wireless networks for your home.
2. Creating a secure wireless network for your kids
Now you’ve set up your access point as a router to broadcast your home network (as indicated in blue in the image below), it’s time to set up a secure network for your kids (indicated in red).
Step 1: On your home screen, tap on the Network tile.
Then tap on the + button in the bottom right-hand corner to add a new network.
Step 2: Make the following selections:
- For network type, choose Wireless
- For usage, select Employee
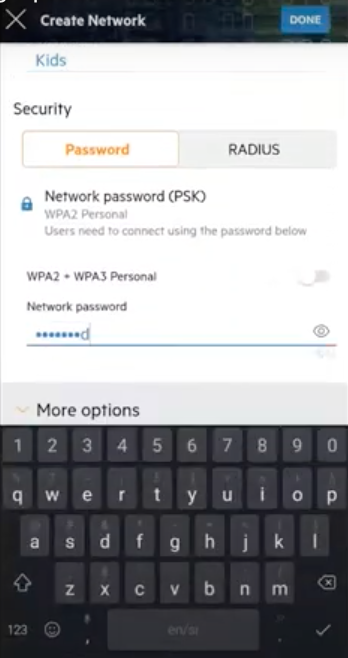
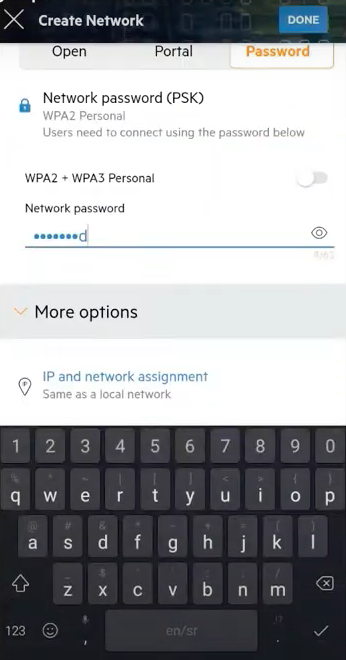
- For security, select Password
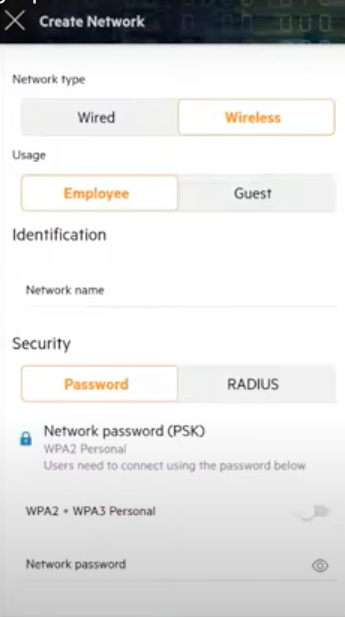
Name the network (Kids) and then choose a password to secure the network.
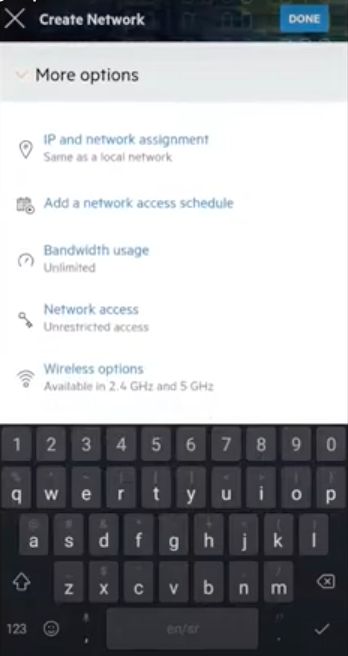
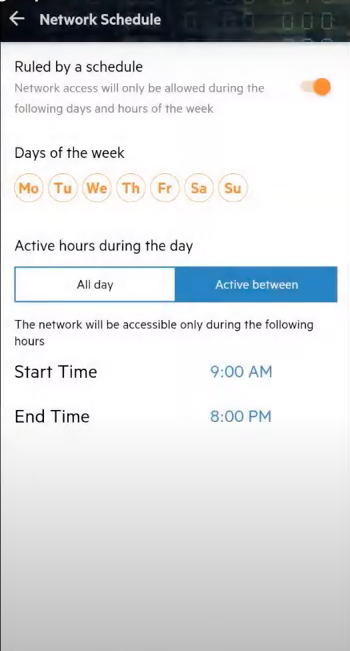
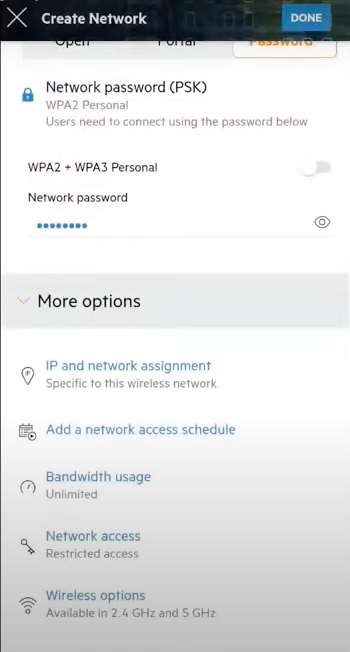
Step 3: Let’s add some restrictions to the network to ensure the kids aren’t online when they should be sleeping. Chose more options and tap Add a network access schedule.
Let’s set a schedule for 7 days a week, between 9am and 8pm. Tap back.
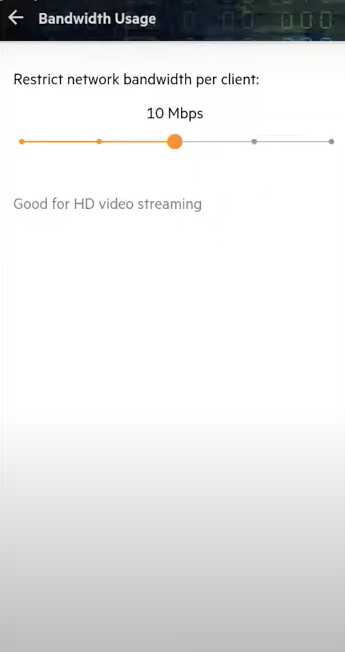
Step 4: Let’s also restrict their bandwidth usage to limit network interference for you or your partner when working from home.

10Mbps should be sufficient for their needs.
Tap on the back button, click done and review the access controls for your newly created kids network.

Step 5: To further secure the kids network, we’ll restrict access to inappropriate content. Tap on the applications tab.
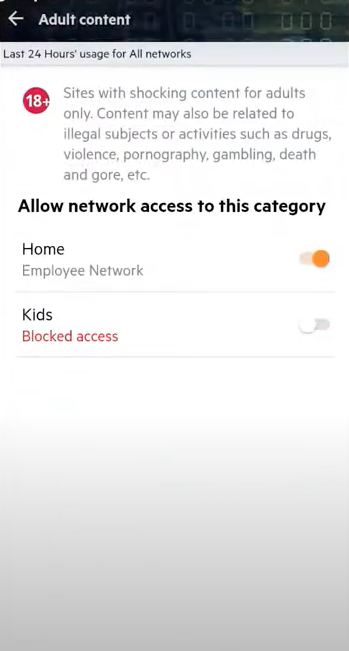
Scroll down the list until you see adult content.
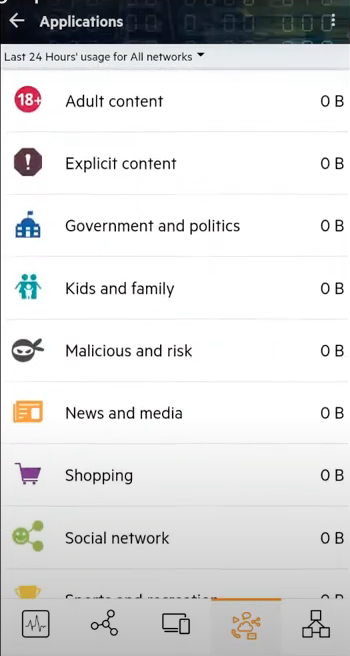
Tap on it and block access on the kids network.
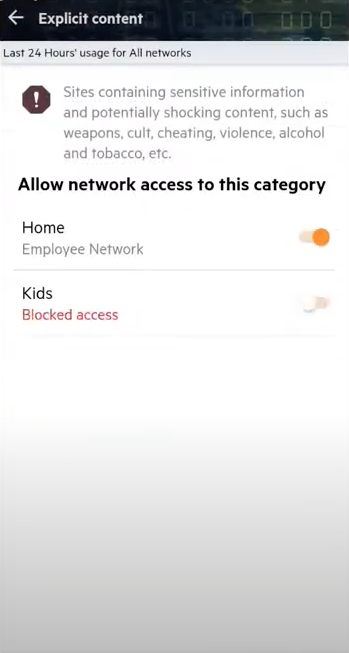
Repeat for explicit content.
And for malicious and risk sites as well.
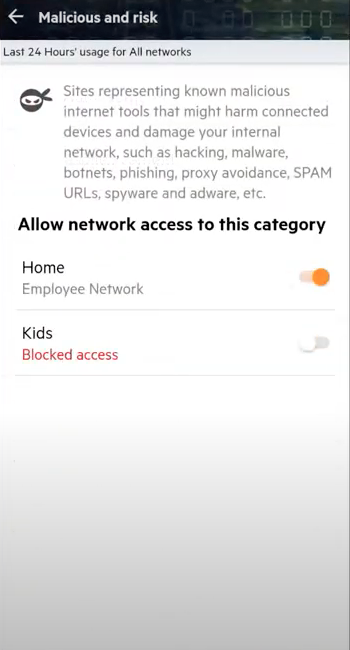
Please note, these protections are not a replacement for antivirus software or other content management software. Rather, they act as an additional layer of defence.
Step 6: Tap back to home and add clients to the newly created kids network.
Tap on the clients tab.
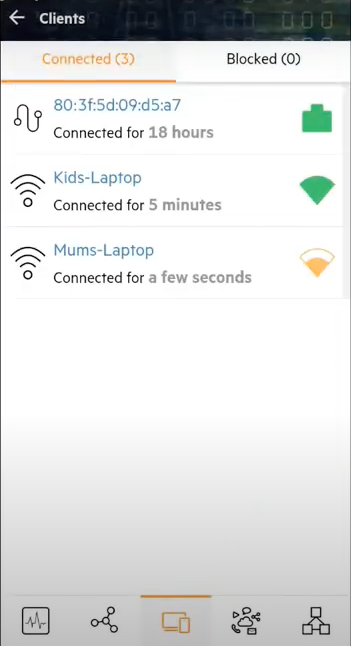
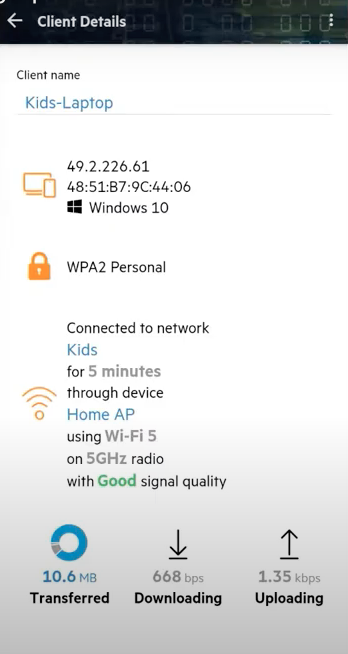
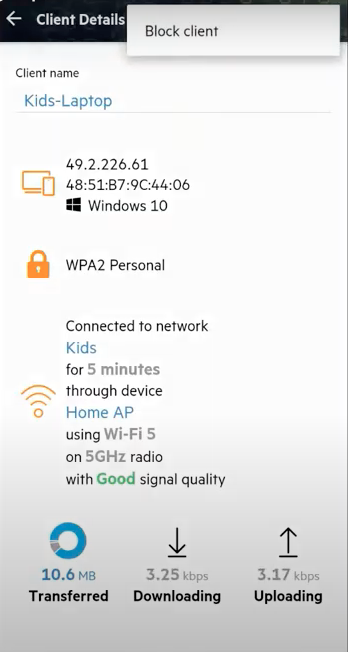
And check on the newly connected device. You’ll see it’s connected to the kids network through the access point.
Step 7: Now, if you want to get the kids down for dinner, you can tap the three dots in the top right-hand corner and block this client from the network, to stop their access to the internet.
This will block the client and add it to the blocked clients list.

To unblock, tap on the blocked clients list, select the client you wish to unblock and tap unblock.
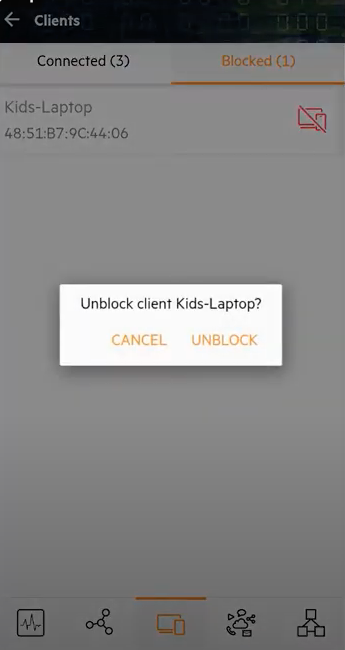
The client will be able to join the network again.
Step 8: Tap back twice to the home screen and you’re done. You’ve set up a secure wireless network for your kids, with a range of controls and the option to block access to the network as needed.
3. Configuring a secure wireless network for guests
Now you’ve set up your home network and have created a separate secure network for your kids (as indicated in blue in the image below), you can move onto creating a dedicated wireless network for guest use (indicated in orange).
Step 1: On your home screen, tap on the network tile.
Tap on the + button in the bottom right corner to add a new network.

Step 2: make the following selections:
- For network type, choose wireless
- For usage, select guest
- Name the network guest
- Choose password to authenticate guest users

Set the password and scroll down for more options.
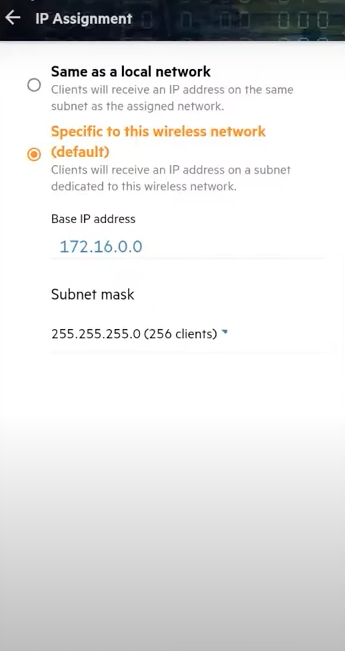
Step 3: We don’t want guest users on our home network. Instead, we want to segregate them on their own network for added security. Tap on IP and network assignment.

Select Specific to this wireless network. This will create a new subnet for guests.
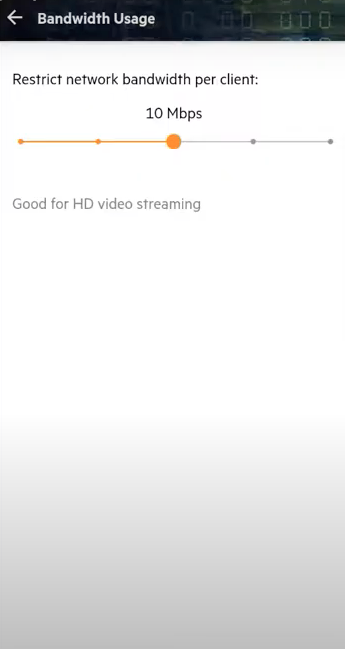
Step 4: Limit bandwidth usage for guests to make sure your home network is not affected by selecting Bandwidth usage.
Restrict network bandwidth per client to 10Mbps.
Step 5: Review the settings and tap on Done to complete.

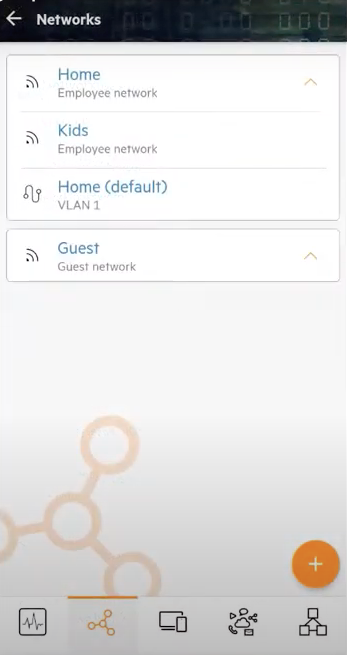
You can see a new network has been created for guests, separate from your home network.
Step 6: Let’s connect the client to this guest network. First, tap on client.
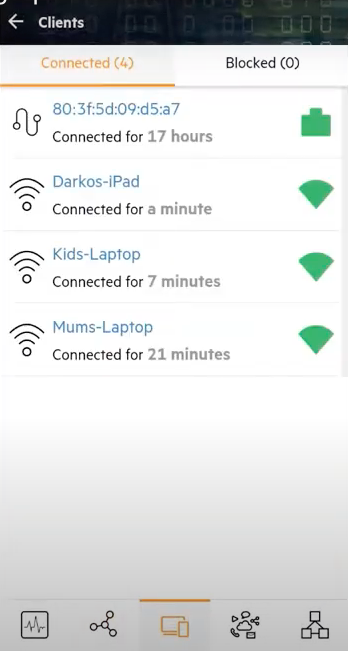
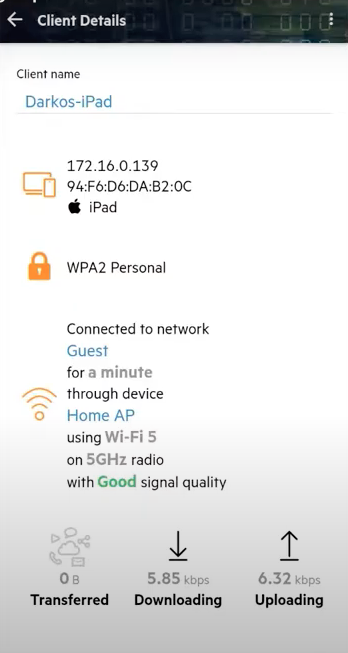
Then click on the newly connected device. You’ll see it’s connected using the new guest network and has good signal quality.
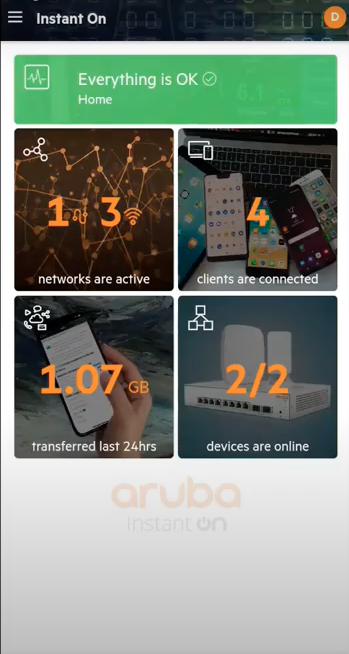
Step 7: Tap back twice and return to the home screen. You’ll now see there are 3 wireless networks set up with 4 clients connected. You’ve successfully set up a secure wireless guest network, separate from your home and kids networks.
4. Extending your wireless network using an additional access point
You’ve set up your access point as a router broadcasting your home network. You’ve set up a dedicated kids network and have created a network for guests as well (as indicated in blue in the image below). Now, you can extend your wireless network using an additional access point to cover the far reaches of your home (indicated in orange).

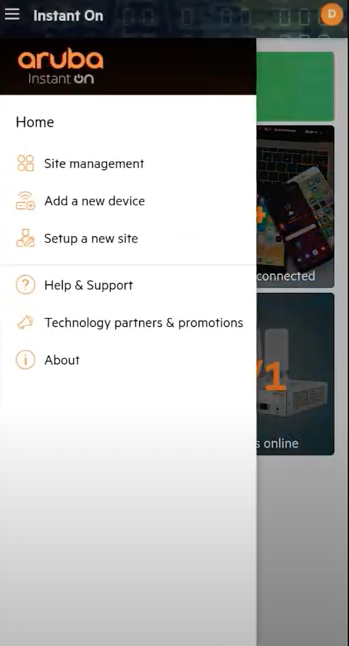
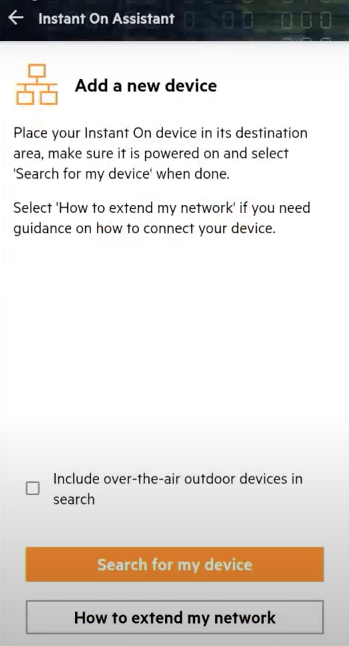
Step 1: On the home screen, tap on the hamburger icon in the top left-hand corner and select Add a new device.
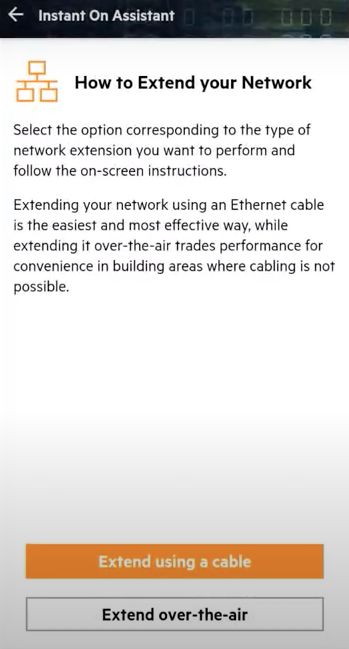
Step 2: Click on How to extend my network.
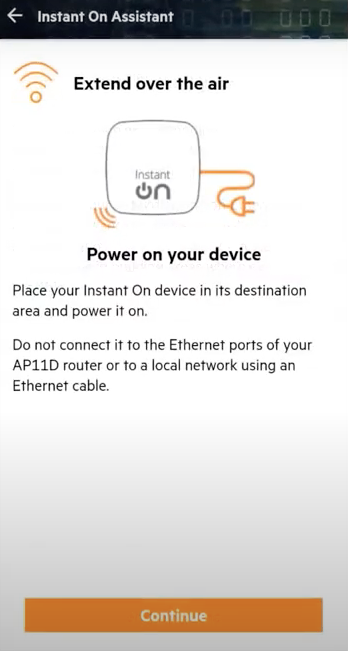
There are two ways you can extend your network. You can use a cable to connect additional access points or connect over the air if you don’t have cabling. As we don’t have cabling, we’re going to connect over the air.
You should place your second access point in the area where you’d like to extend your wireless coverage, but make sure it’s in a place where it can connect to the primary access point. If you move it too far, the access points won’t be able to communicate wirelessly. Make sure your second access point is powered up but not plugged into an ethernet switch.
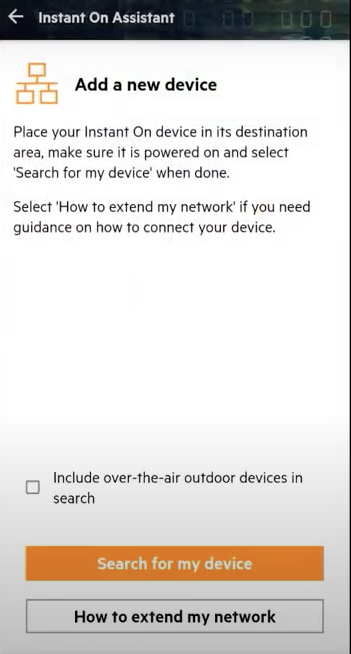
Step 3: Once the lights on your second access point are flashing green and amber, tap on Search for my device. Ensure your phone Bluetooth is turned on and that you are close to the AP you are trying to discover.
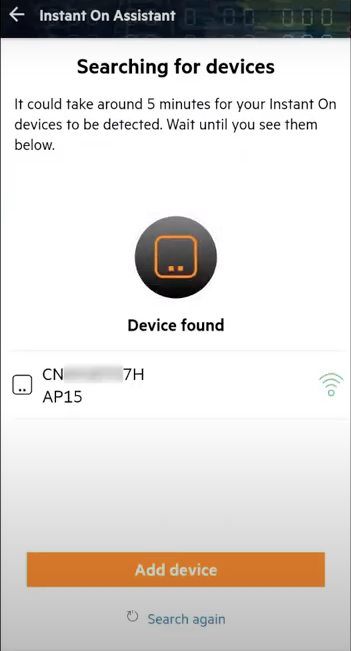
Step 4: Tap on Add device.
Confirm it’s your device and click Accept.
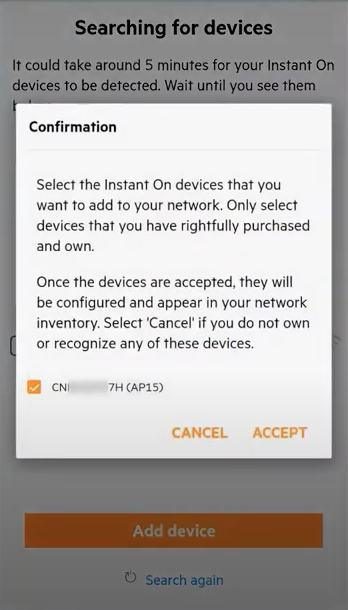
Your new access point has been added to the network.
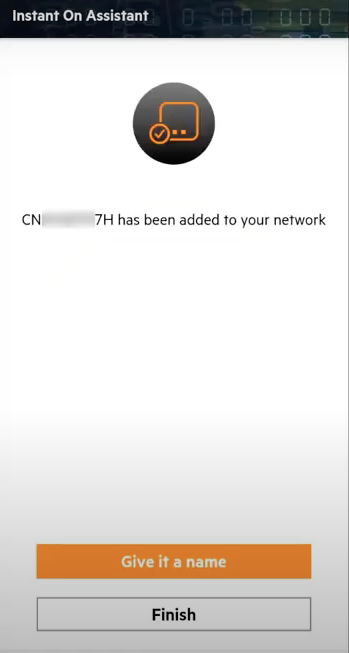
Step 5: Give your new access point a name.

Tap back and you’ll see it sync with the cloud.
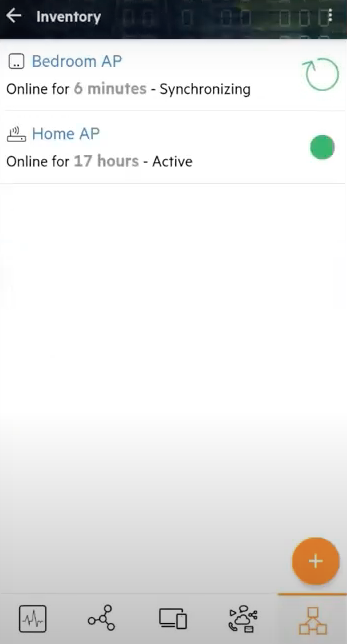
Once the synchronisation is complete, the access point will start broadcasting all the networks you’ve set up. And that’s it! You’ve now extended the coverage of your wireless network by using an additional access point.
To follow a run-through of these steps in real-time, check out our series of Home Network video tutorials – https://instanton.club/library-category/home-network-setup/.